BATCAM FX Shell Software Update
BATCAM FX Firmware Update (via Shell)
1. Overview
This guide explains how to update the BATCAM FX firmware (.swu file) from a shell (terminal) using the scp and ssh commands together with the SWUpdate tool built into the device. Some features, such as the overlay and ROS-related REST APIs, are only available in firmware 1.0.3 or later, so we recommend keeping the firmware up to date.
The overall procedure consists of the following four steps.
-
scpthe firmware file to the BATCAM FX -
Connect to the BATCAM FX via SSH
-
Run the update command (
swupdate) on the BATCAM FX -
Verify the firmware version after reboot
⚠️ Caution: Do not power off the device or disconnect the network while the update is in progress. The device reboots automatically once the update is complete.
💡 Note: For the browser-based update procedure, see BATCAM FX Web Software Update. The BATCAM FX2 is updated from Device Manager with a different file format (
.mender), so follow the FX2 Software Update document instead.
2. Prerequisites
-
Firmware file (
.swu): Prepare the firmware file to install on your working PC. The file name follows the formatSMI-BATCAMFX-<version>-signed-<build-timestamp>.swu. (Example:SMI-BATCAMFX-v1.0.3b-signed-20250502102525.swu) See the FX Firmware Release Notes for the changes in each version. -
Device IP address: You need to know the IP address of your BATCAM FX. The examples in this document use
192.168.50.11; replace it with the IP address of your actual environment. -
Network connection: The working PC and the BATCAM FX must be able to communicate with each other on the same network.
-
Terminal environment: You need a shell that can run the
scpandsshcommands. (Windows PowerShell, or the macOS/Linux terminal) -
SSH login account: You must be able to connect to the device’s
rootaccount over SSH.
3. Step 1 — Upload the Firmware File (scp)
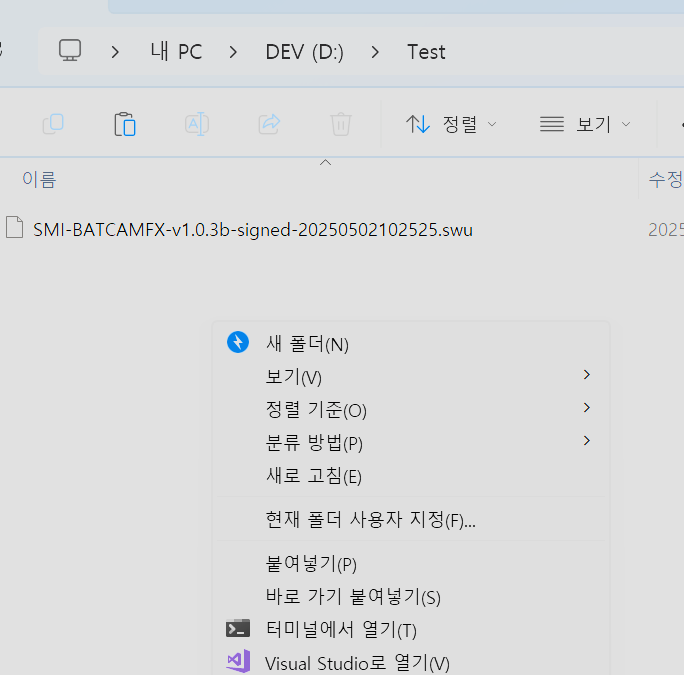
- Open a shell in the folder that contains the firmware file.
-
Windows: Shift + right-click in that folder and click ‘Open in Terminal’ or ‘Open PowerShell window here’.
-
macOS/Linux: Open a terminal and use the
cdcommand to navigate to the folder containing the firmware file. From this point on, thescpandsshcommands are the same on all operating systems.
- Then upload the firmware file to the BATCAM FX with the
scpcommand.
scp ./SMI-BATCAMFX-v1.0.3b-signed-20250502102525.swu root@192.168.50.11:~/# Replace the SMI-BATCAMFX-v1.0.3b-signed-20250502102525.swu part with the# actual name of the firmware file you are installing.💡 Note: Replace
192.168.50.11with the actual IP address of your BATCAM FX. (This applies to all subsequent commands as well.)
4. Step 2 — Connect via SSH
Connect to the BATCAM FX with the root account over SSH.
ssh root@192.168.50.11# Change the IP address to match your environment.5. Step 3 — Run the Update (swupdate)
After connecting, run the update with the following command.
swupdate -i ~/SMI-BATCAMFX-v1.0.3b-signed-20250502102525.swu \ -v -p reboot -k /etc/swupdate/swupdate.pem -K /etc/swupdate/aes.key# Replace the SMI-BATCAMFX-v1.0.3b-signed-20250502102525.swu part with the# actual name of the firmware file you are installing.Each option is described below. The two key files are preinstalled on the device, so use the paths as shown.
| Option | Example Value | Description |
|---|---|---|
-i | ~/SMI-BATCAMFX-<version>-….swu | Path to the firmware image (.swu) file to install. Specify the file uploaded to ~/ (your home directory) in Step 1. |
-v | — | Verbose log output. Lets you monitor the update progress in the terminal. |
-p | reboot | Command to run after the update completes. Since reboot is specified, the device reboots automatically when the update finishes. |
-k | /etc/swupdate/swupdate.pem | Key file used to verify the firmware signature. Use the device’s default path as is. |
-K | /etc/swupdate/aes.key | Key file used to decrypt the encrypted firmware image. Use the device’s default path as is. |
6. Step 4 — Verify the Version After Reboot
Wait for the update to complete and the camera to reboot, then reconnect to the BATCAM FX over SSH to check the firmware version.
root@SeeSV-BCMFMC0D6:~# cat /etc/os-releaseID=seesvNAME="SeeSV (SM Instruments Inc.)"VERSION="4.0.16 (kirkstone)"VERSION_ID=4.0.16PRETTY_NAME="SeeSV (SM Instruments Inc.) 4.0.16 (kirkstone)"DISTRO_CODENAME="kirkstone"BUILD_ID="20250411173035"SEESV_RELEASE_VERSION="v1.0.3b"SEESV_VENDOR_NAME="SMI"SEESV_PROD_MODEL="BATCAMFX"SEESV_RELEASE_VERSION should match the version of the firmware file you installed (v1.0.3b in the example above); if it does, the update completed successfully.
You can also check the version through the REST API, without an SSH connection. Call GET /setting/status (device information query) and read the current firmware version from the firmware_version field in the response. This API uses HTTP Basic authentication; see the BATCAM FX API Reference for the detailed request and response formats.
curl -u admin:<password> http://192.168.50.11/setting/status7. Troubleshooting
-
If scp/SSH cannot connect:
-
Verify that the IP address in the command is the actual IP address of your BATCAM FX.
-
Verify that the working PC and the device are connected to the same network.
-
-
If swupdate exits with an error:
-
-ioption: check that the specified file name and path exactly match the file uploaded in Step 1. -
The file may have been corrupted during transfer; upload the firmware file again with
scpand rerun the command. -
-kand-Koptions: do not change the key file paths; use the device’s default path (/etc/swupdate/) as is.
-
-
If you cannot connect to the device after reboot:
- If the device is not in static IP mode, its IP address may change after a reboot. Check the new IP address and connect again.
-
If the version is unchanged after the update:
-
You may have checked before the reboot finished; check again after the reboot completes.
-
If the previous version is still shown, repeat the procedure from Step 3 (running the update).
-
8. Related Documents
-
BATCAM FX Web Software Update — Update method that uploads the firmware file from a web browser
-
FX Firmware Release Notes — Changes in each firmware version
-
ROS Domain ID Setup — Another configuration example that uses SSH access
-
BATCAM FX API Reference — REST API specification covering device information query (
/setting/status) and other endpoints