Getting Started with the FX2 Device
1. Overview
This document explains how to access Device Manager and change the initial password when using a BATCAM FX2 device for the first time.
Device Manager is a device management program for configuring BATCAM FX2 devices and monitoring their current status, accessed via the device IP address. For the full menu layout, see the Device Manager Menu document.
2. Factory Default Settings
Out of the factory, the network and accounts are configured as follows.
| Item | Default | Description |
|---|---|---|
| Ethernet #1 IP address | 192.168.0.80 | Factory default |
| Ethernet #2 IP address | 192.168.0.81 | Factory default |
| Administrator account | ID admin / password 1234 | Account cannot be deleted |
| Read-only account | ID user | Standard read-only user provided from the factory |
💡 Note:
admin/1234is the factory default; you must change it to a new password on first login.
-
FX2 provides two wired Ethernet ports, and each supports both DHCP and STATIC IP. To change the IP address, see the network settings section of the Settings document.
-
To add or delete users or change passwords, see the User Management document.
3. Accessing Device Manager
-
Set your PC to the same network range as the device (
192.168.0.x). -
In your web browser’s address bar, enter
http://192.168.0.80. (Based on the Ethernet #1 factory default IP.) -
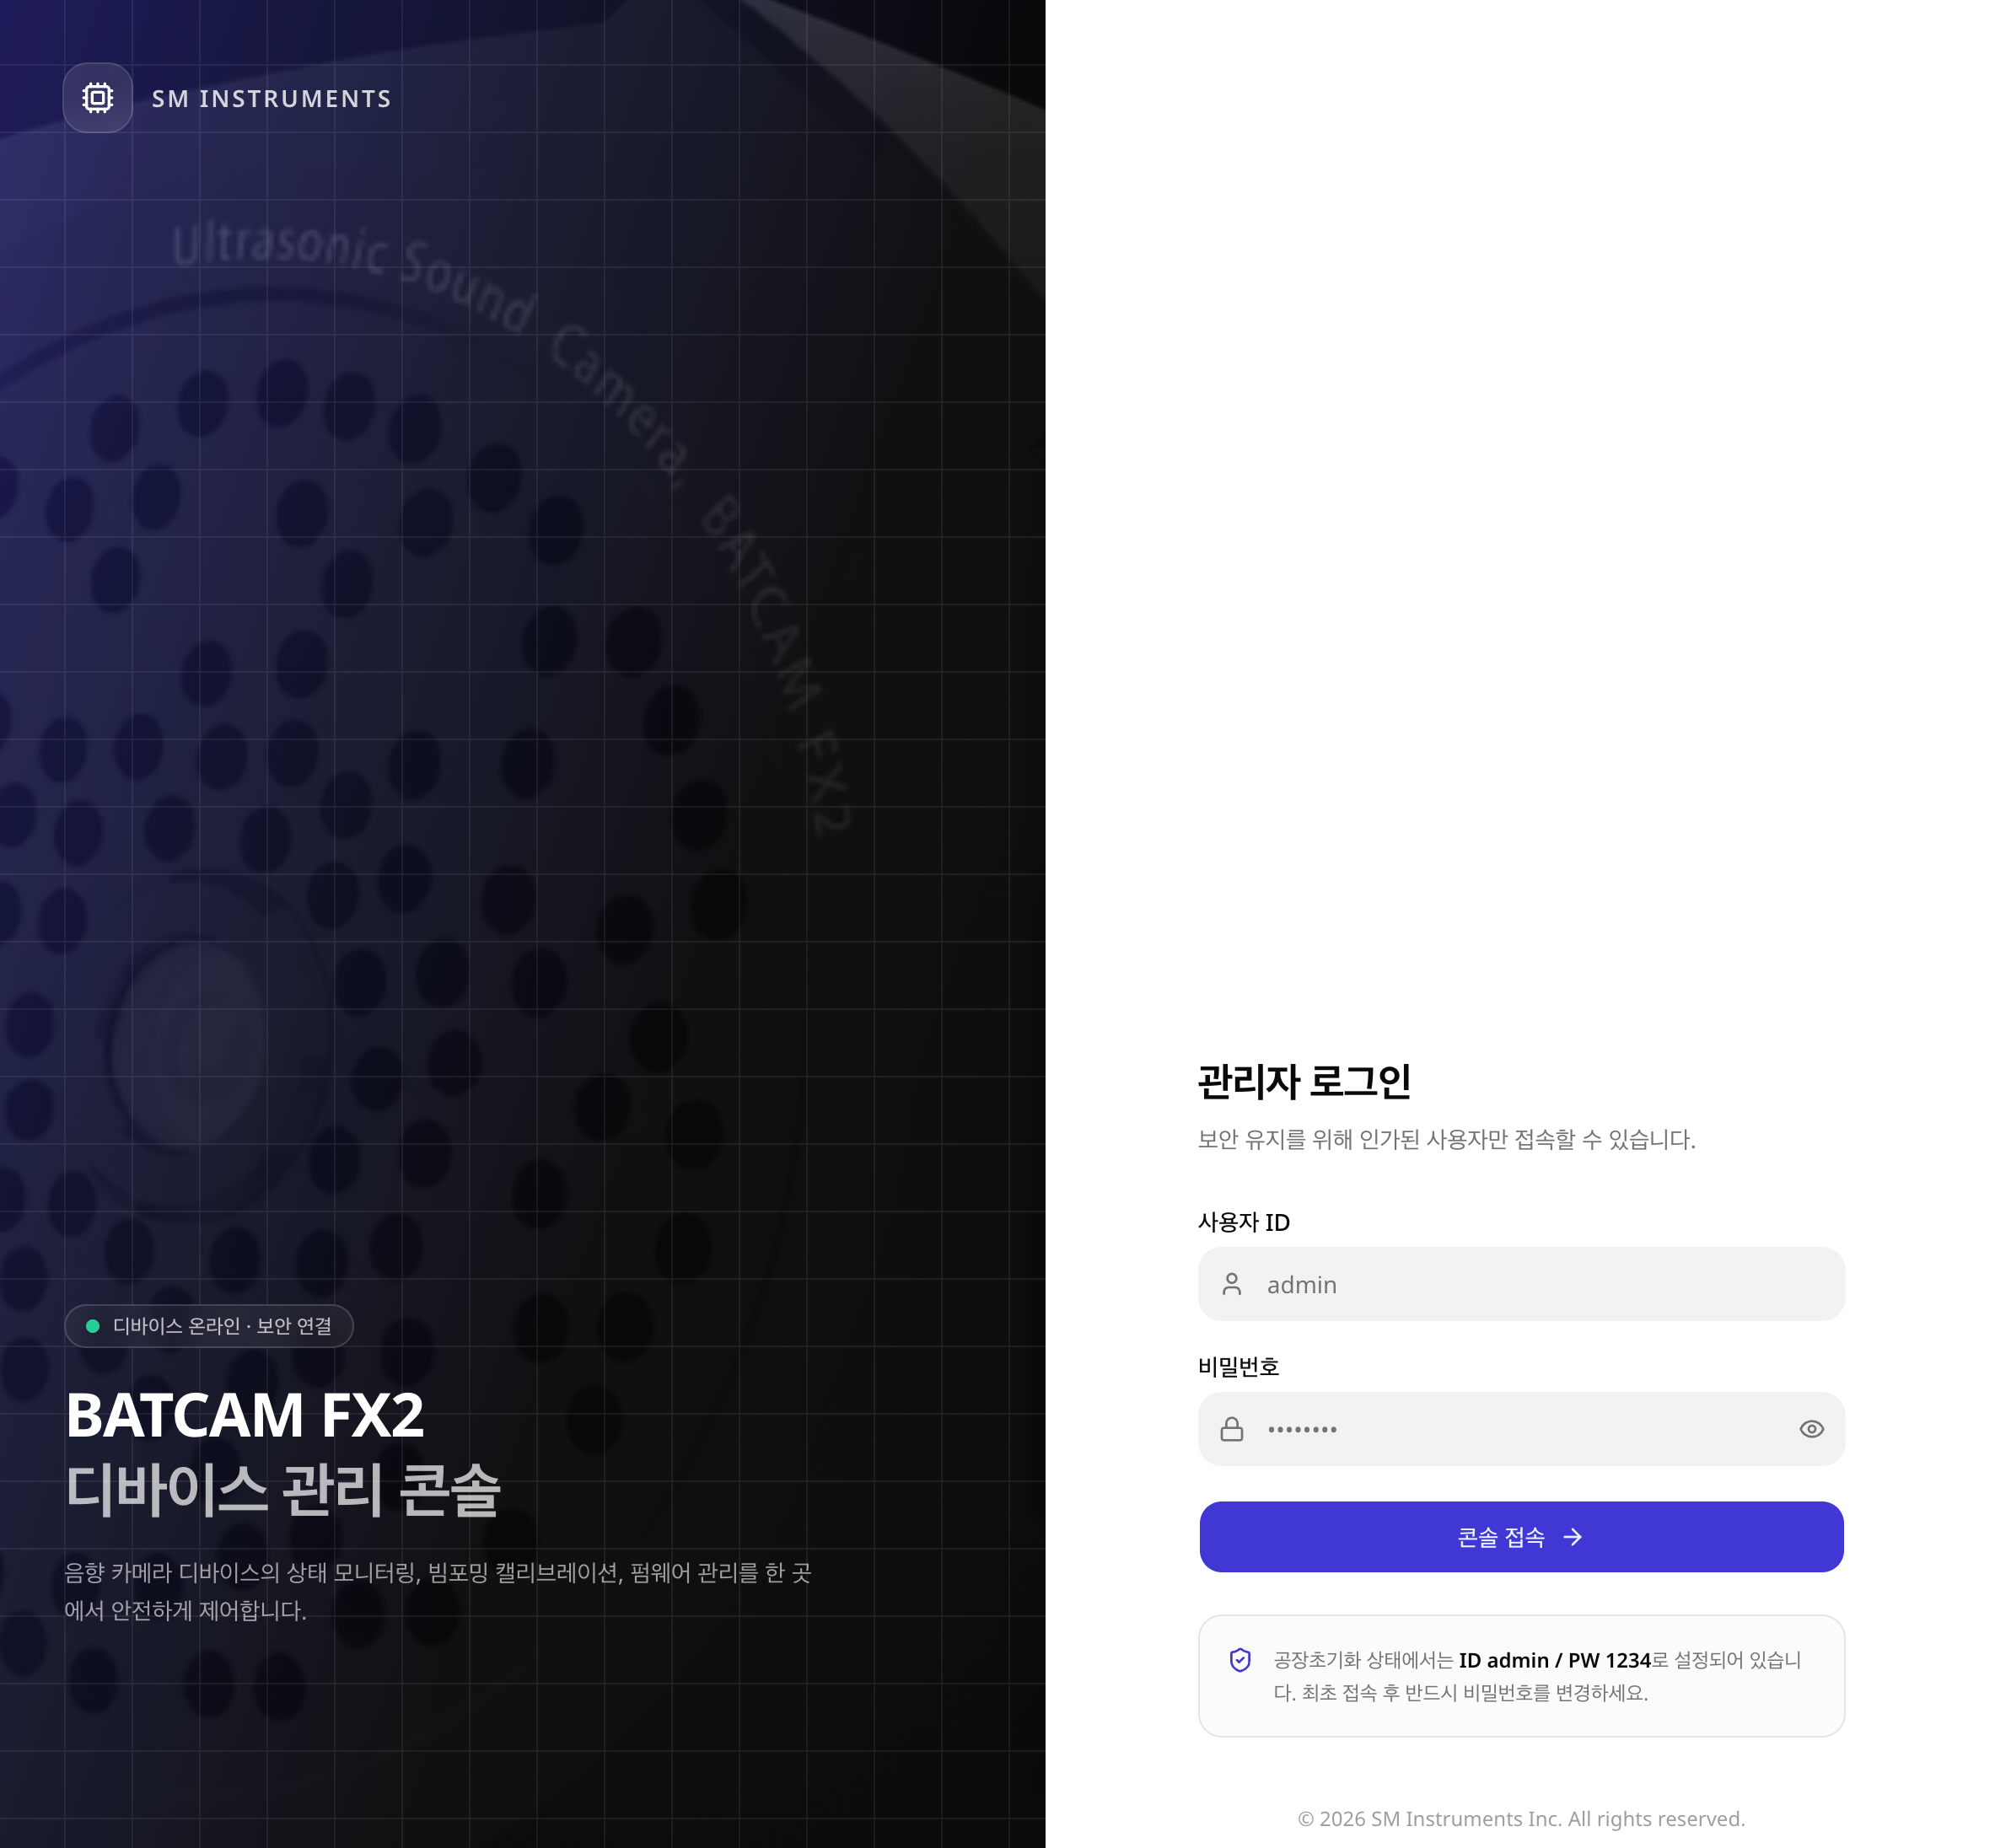
Enter ID / PASSWORD:
admin/1234to log in.
4. Changing the Initial Password
You must change the initial password on first login.
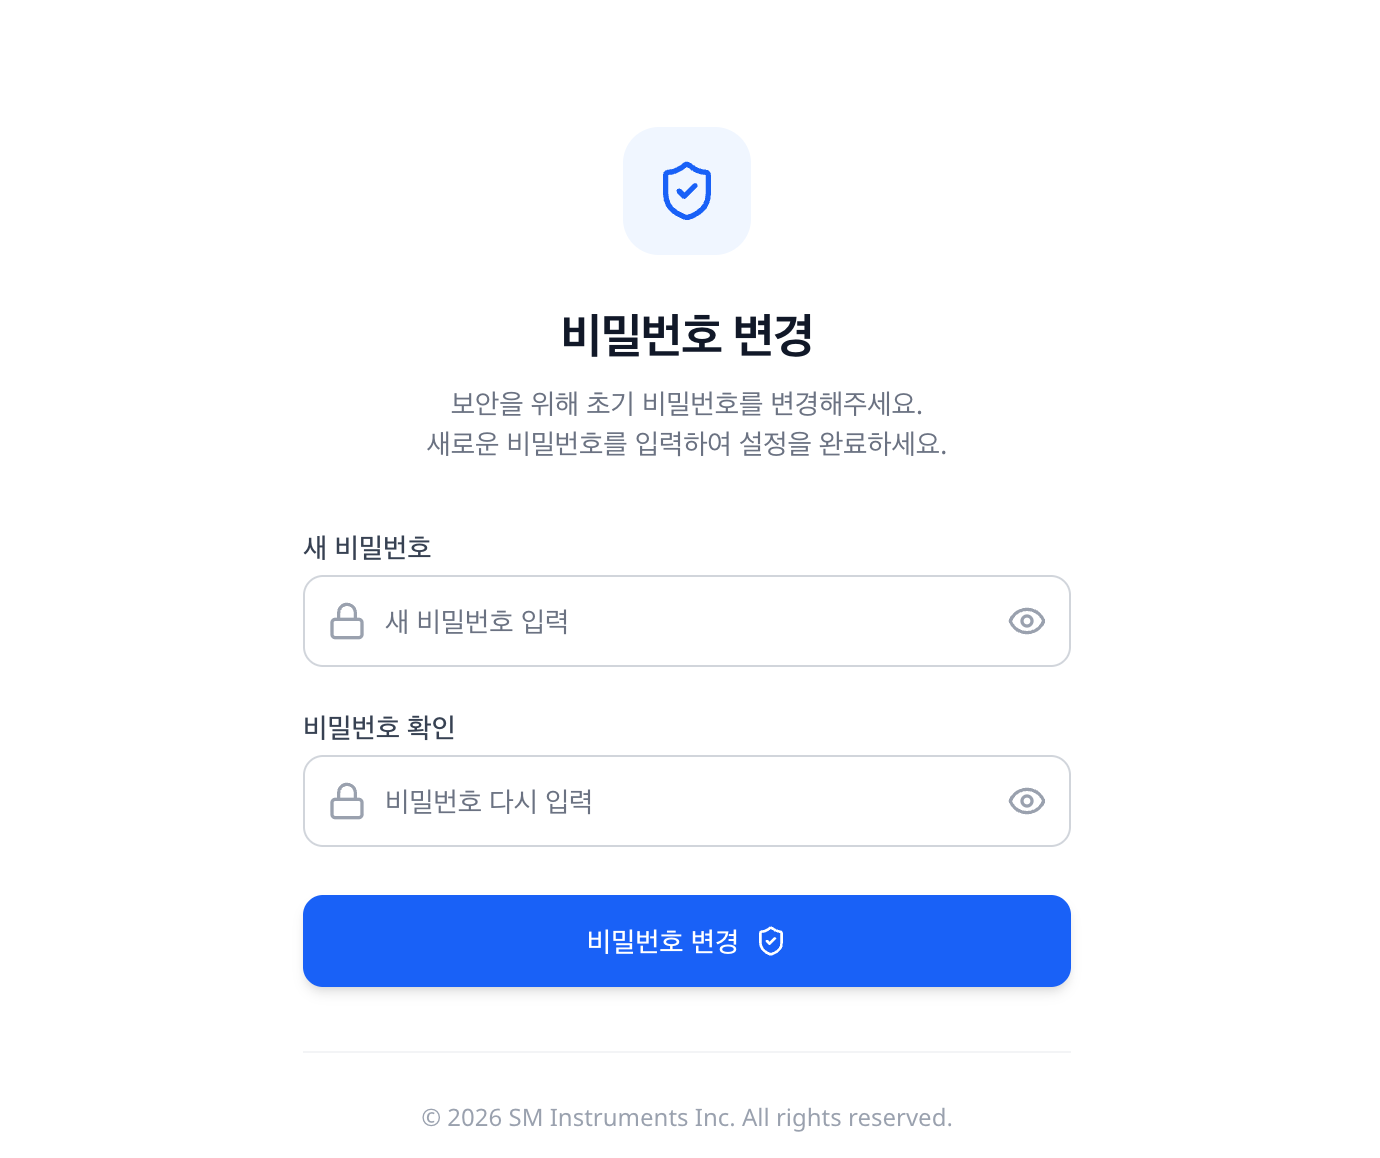
Enter a new password. (1234 cannot be used as the password.)
- The factory-provided
adminaccount cannot be deleted. For details, see the User Management document.
5. Verifying the Connection
In the device REST API, GET /ping is a health-check endpoint that requires no authentication. Use it to quickly check network connectivity to the device.
curl http://192.168.0.80/ping{"error": 0, "result": "pong"}-
/pingaside, most device API endpoints require HTTP Basic or Bearer (JWT) authentication. -
The full API documentation is available in the FX2 API Reference, and the live spec served directly by the device can be retrieved with
GET http://{device_ip}/api-docs/json.
6. Troubleshooting
-
If you cannot connect:
-
Check that your PC is configured on the same subnet as the device (
192.168.0.x). -
ping 192.168.0.80lets you check whether the device responds. Depending on which Ethernet port the device is connected to, the factory default is192.168.0.80for Ethernet #1 and192.168.0.81for Ethernet #2. -
Settings — if the device’s network settings (DHCP/STATIC) have been changed, connect using the changed IP address instead.
-
-
If you need to restore the device to its factory state:
- Settings provides a factory reset that restores the factory default settings above. Use caution: a factory reset erases all data, and the data cannot be recovered.
7. Next Steps
-
Device Manager Menu — Covers the full set of management features provided by Device Manager.
-
Settings — Explains network settings (DHCP/STATIC IP), restarting services, and performing a factory reset.
-
User Management — Explains how to add and delete users and change passwords.
-
FX Cloud Sign-up — Create an FX Cloud account to use account-based features such as linking your camera device.
-
Python Protobuf Example — Provides example code for receiving device data over REST and WebSocket + Protobuf.
-
FX2 API Reference — Provides the full specification of the device’s embedded REST API.